Building the LEGO UCS Venator – A Slow, Heavy, Brilliant Build
I finished building the UCS Venator during Christmas, and at over 5,000 pieces it has been one of the most demanding LEGO builds I’ve taken on so far. Not difficult in a frustrating way, but demanding in terms of focus, space, patience, and sheer physical tiredness by the end of a session.
I’ve already written about why I wanted to buy the Venator and where it sits in my growing UCS collection, but this post is more about the build itself. The practical side. The moments where things flow beautifully, and the moments where you really should stop, step away, and come back fresh.

I was extremely tired after a very busy Christmas rush, so I took my time and built this over four days, starting on Christmas Day and finishing on the 28th. I could have completed it quicker, but that would have felt rushed and would almost certainly have spoiled the experience for me.
Initial Setup – Space Matters More Than You Think
Before opening the boxes and starting with bag 1, the most important decision was where this build was going to live.
This is not a kitchen table project unless that table is large, unused for days, and not needed for anything else. I set up one of my well-used large market stall tables, with clear space on all sides and plenty of room for instruction books, spare trays, and completed sub-assemblies.
All the bags in box 1 were laid out in order first, with the manual opened and ready. I also used a smaller table so I could build each bag comfortably from a seated position, keeping the main table free for bags and completed sections.
Difficulty: ★☆☆☆☆
Lesson: If you rush the setup, you’ll regret it later.
Main Chassis
The main chassis is where the Venator starts to reveal just how serious this build is. Long Technic beams, internal structure, and a lot of repetition, but it feels solid and reassuring rather than boring.
Compared to the Star Destroyer, this section feels stronger overall, but the Venator is a longer run, so progress comes from patience rather than quick wins.
You can feel the model’s weight building even at this early stage.
Difficulty: ★★☆☆☆
Feeling: Confident, methodical, enjoyable.

Rear Chassis Connection
This stage demands attention. The rear structure locks into the main chassis and alignment really matters. It’s not hard, but mistakes here would echo through later sections.
I slowed down deliberately at this point and called it a day once the section was finished.
Difficulty: ★★★☆☆
Tip: Double-check symmetry before moving on.

Tower Mount
This is a smaller section, but psychologically important. The tower mount is the point where the Venator starts to feel real. Up until now it’s been structure; this is identity.
As I mentioned in my other post, the two independent bridge design feels like a mistake in the Star Wars universe, but it works surprisingly well on this LEGO model and gives the ship a distinctive look.
Difficulty: ★★☆☆☆
Feeling: A nice morale boost mid-build.

Rear Undercarriage Sections
These sections are satisfying but repetitive. Lots of mirrored work, lots of “did I already build this side?” moments.
This is where tiredness can sneak in if you push too long. I was already exhausted from the pre Christmas rush and I eventually called it a day when I finished this bit.
Difficulty: ★★★☆☆
Advice: This is a good stopping point if you’re feeling mentally drained.

Front Triangular Section
This is one of the most recognisable parts of the Venator, and one of the most intricate. Angles matter. Connections matter. You start to appreciate LEGO engineering here.
Difficulty: ★★★★☆
Feeling: Slow, careful, very rewarding.

Engines
The engines are excellent. Repetitive, yes, but in a satisfying way. Each one feels like progress, and seeing them lined up at the rear really changes how the model looks. I did have to go backwards a few times due to mistakes but I got there in the end.
Difficulty: ★★☆☆☆
Feeling: Therapeutic after heavier structural work.

Front Underside – Port & Starboard
This stage requires patience. You’re working underneath, often lifting or tilting the model slightly, and fatigue becomes a factor. The sections fit and click together but you have to be careful and align them first before snapping them together.
This is where I stopped for the night rather than push on and risk mistakes.
Difficulty: ★★★☆☆
Advice: If you’re tired, stop here.

Rear Upper Plating – Port & Starboard
Large panels, clean lines, and lots of visual payoff. The Venator finally starts looking finished. There is symmetrical replication here but at this stage the excitement of nearing the end spurs you on.
Difficulty: ★★☆☆☆
Feeling: Momentum returns.

Front Upper Plating – Port & Starboard
This is precision work again. Panels need to sit just right, and alignment is everything. The red portion is very delicate until fully assembled and the you can slot into place easily enough.
By this stage, the model is heavy and awkward to move, so planning your hand positions matters. I hope you'll excuse the look of the table in these photos, it's clean but well used with some damage.
Difficulty: ★★★★☆
Tip: Clear your table before starting this stage.

Lifting the Model Safely
This deserves its own section.
The UCS Venator is heavy, long, and not designed to be casually picked up. I used two hands, supported the central chassis near the stands, and avoided lifting by the ends or plated sections.
If you’re moving it alone, move slowly and deliberately.
Advice: Treat it like a newborn baby, not a toy.
The Display
Before starting the build, I cleaned and adjusted all my shelves and planned exactly where the Venator would sit once it was finished. I placed it in the middle, underneath the Star Destroyer, as it felt more balanced there than above it.
Now that it’s in place, it really does look the part.

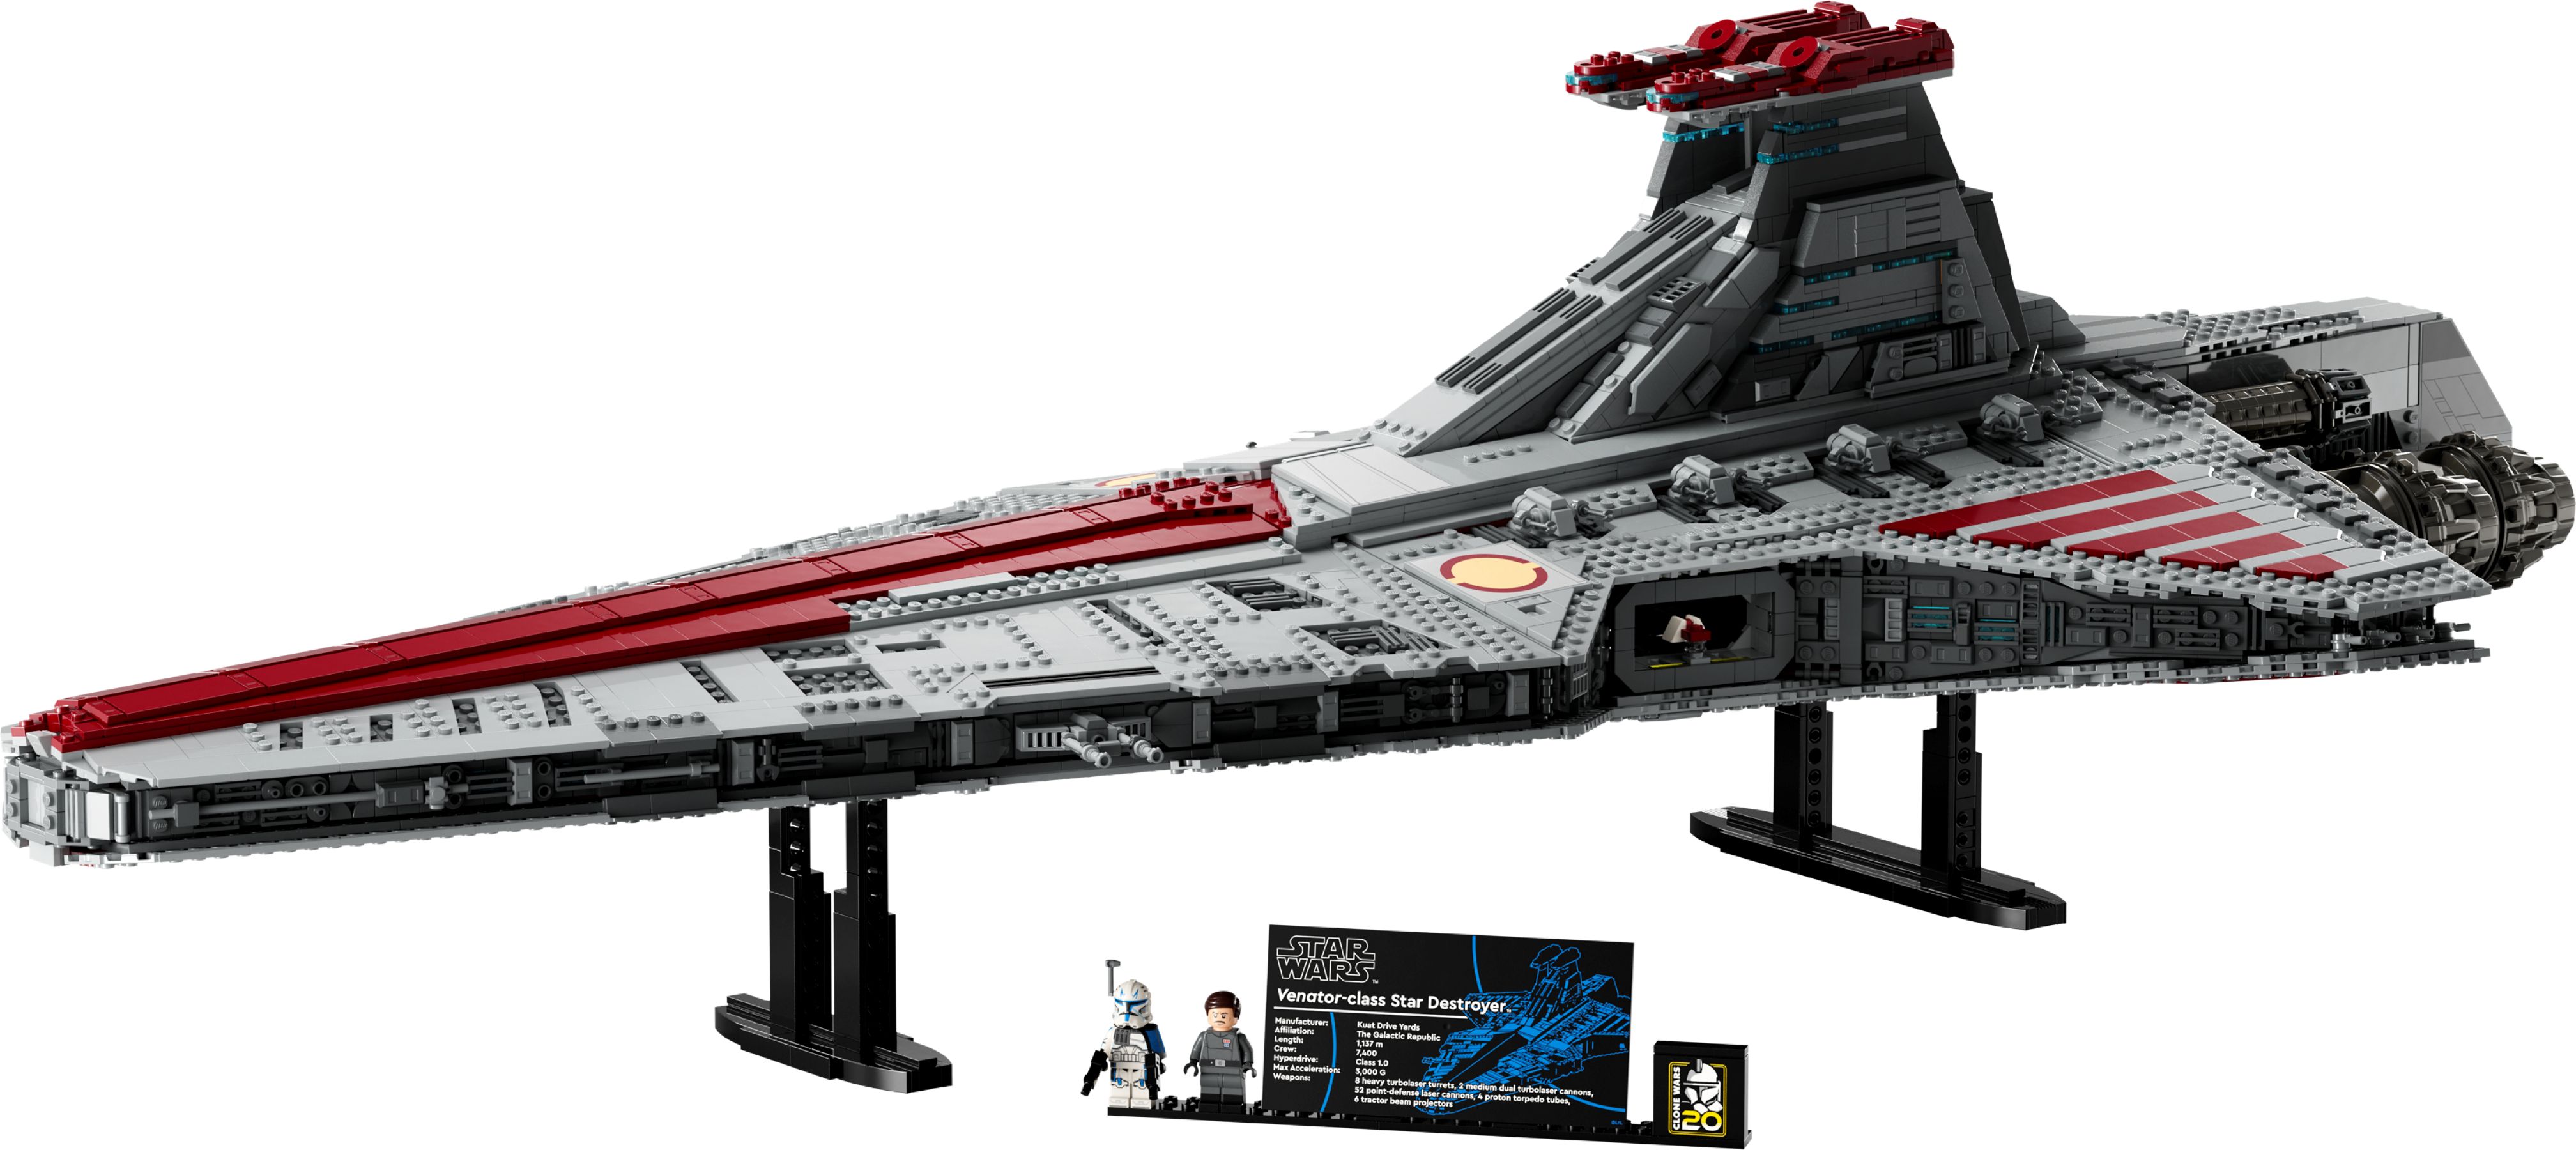
Where to Buy Your Own UCS Venator
This is the LEGO UCS Venator-Class Republic Attack Cruiser. I’ve linked the official LEGO listing below for anyone who wants the full details or availability. Just Click the image below to go to LEGO Shop.
You can also pick up some excellent accessories like lighting kits on Amazon via the links below.
Browse LEGO Venator on Amazon UK. | Browse LEGO Venator on Amazon Ireland.
Affiliate links – I may earn a small commission if you buy, at no extra cost to you.
The Venator and many other products also appear in my Amazon UK Storefront, where I group related recommendations together for easier browsing.
A small note: If you are buying from Amazon anyway, using one of my links is a simple way to support the blog without costing you anything extra. Even if you end up buying something different, I may still receive a small commission. Thanks for considering it.
Final Thoughts
The UCS Venator isn’t a build to rush. It rewards patience, space, and knowing when to walk away and come back fresh. It’s challenging without being frustrating, and demanding without being punishing.
If you’d like to see my other UCS builds, you can browse the LEGO label on the blog. Taken together, they tell the bigger story, not just how these sets are built, but why I enjoy building them in the first place.
If you’ve built the Venator yourself, I’d love to hear how you got on. Feel free to share your experience in the comments below.
Thanks for Reading,
David
More Titles for You to Read:
Smart Amazon Health & Fitness Products That Actually Help
Clever Home & Kitchen Finds on Amazon That Just Make Life Easier
Useful Amazon Tools and Gadgets Every Maker or Handyman Should Have
About the Author
I’m David Condon, a small business owner and blog writer based in Tralee, Co. Kerry. Running my own woodcraft business means I’ve seen first-hand how much confusion there can be around shipping times, delivery dates, and what “business days” actually mean. That’s why I wrote this post — to share a bit of what I’ve learned and hopefully save you some frustration.
Every so often I step outside the workshop to write about wider business topics like this one. If you’d like to know more, you can follow the link in the Note from the Author section below or visit my About Me page to learn more.
💬 Note from the Author
This post was written specially for David Condon Finds. If you enjoyed it, you might also like my other projects:
Phoenix DVD Blog – where I write about DVDs, Blu-rays, and life as a collector
David Condon Woodcraft – my main site focused on woodturning and handmade Irish pieces
If you’d like to support my writing, you can do so through the Buy Me a Coffee button below. It helps keep these side projects going — thank you!
Like what you're reading? You can buy me a coffee — sure it’s cheaper than a pint!
Original content © David Condon Finds — Written by David Condon. Please credit and link if shared.


Comments
Post a Comment